The ultimate guide to the Nvidia control panel for gaming performance.

Hey guys! this is Assembledtech today I'm gonna show you the optimization guide of Nvidia control panel for gaming performance, FPS boost, and many improvements that provide you better visual and gaming on any Nvidia graphics card.
First, find out which Graphics Card you have installed on your PC or laptop.
- Its a very simple task just right click on your desktop, context menu appear then click on Nvidia control panel settings.
- Now navigate to Help Tab > System Information there are you find the Graphics card details like GPU name (mine is GTX 1050), VRAM size, clock speed, and many other technical things.
Download the latest Nvidia Drivers if you did not install Nvidia GeForce Experience.
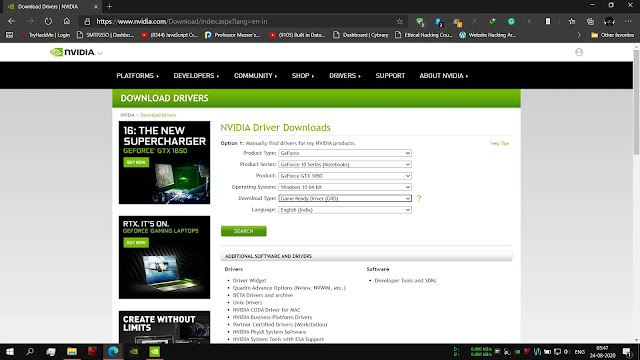
Now navigate to this link https://www.nvidia.com/Download/index.aspx?lang=en-in
In this link, you can find any Nvidia graphics card driver. Just select options according to your graphic card then download it. The advantages of updating your GPU drivers are many fixes, new and improved settings, and additional options that are available in the latest drivers. If you haven't updated your GPU driver in a while is highly recommended that you update around about one in three months and ensure that running on the optimized and bug-free drivers.
After updating drivers restart your system.

Setting up Nvidia Control Panel.
- Now right click on desktop and open Nvidia Control panel, after that select the first option of 3D setting which is Adjust image setting and preview. Select middle option Use the advanced 3D image setting and then press Apply.
Select the second option of 3D setting which is Manage 3D setting. This is important settings for better results copy these all same as shown in the image. Some option not show in your Nvidia control panel it depends on which GPU you have. now in Global settings Tab select High-performance NVIDIA Processor and then set it all options same as mine.
- Image Sharpening: On also enable GPU scaling.
- Ambient Occlusion: Performance
- Anisotropic Filtering: Application-Controlled
- Antialiasing-FXAA: OFF
- Antialiasing- Gamma correction: ON
- Antialiasing- Mode: Application-Controlled
- Antialiasing- Transparency: OFF
- Cuda- GPUs: ALL
- DSR- Factors: 2.00x(native resolution), 4.00x(native resolution), and if you face the lowest frames times and input lag. leave OFF.
- DSR- Smoothness: 0% or 10%
- Low- Latency Mode: For best FPS & lowest input lag - ON, lower FPS - Ultra
- Max Frame Rate: if you want smoothest and most consistent FPS set this to below your average game FPS, For higher FPS set your according to your monitors refresh rate. mine 144hz = 144FPS also according to my recommendation turning this OFF.
- Monitor Technology: if you dont know how G-sync works then set it Fixed Refresh Rate for best performance.
- Multi-Frame Sampled AA (MFAA): OFF
- OpenGL rendering GPU: select your GPU in the list (Mine GeForce GTX 1050).
- Power management mode: Prefer maximum performance (FPS boost)
- Preferred refresh rate: Highest available
- Texture filtering- Anisotropic sample optimization: ON
- Texture filtering- Negative LOD bias: Allow
- Texture filtering- Quality: High Performance
- Texture filtering- Trilinear optimization: ON
- Threaded optimization: Auto
- Triple Buffering: OFF
- Vertical sync: OFF
- Virtual reality pre-rendered frames: 1
Now Click on APPLY
After setting up these all navigate to Set PhysX Configuration then click on Select a PhysX processor: GeForce GTX, RTX which GPU you have
Make sure to follow all of these settings as possible. Some settings might be different for you and your setup, so do your best to match the settings shown, where you can!
We are not responsible for any harm of your system, these all settings are testing on many systems without any problem, hope you set accordingly which I mention here.
If having issues to see the image just click on the image for zoom in.
Thanks a lot for visiting my blog, hope you like my content and for any query just contact through the contact form.


0 Comments